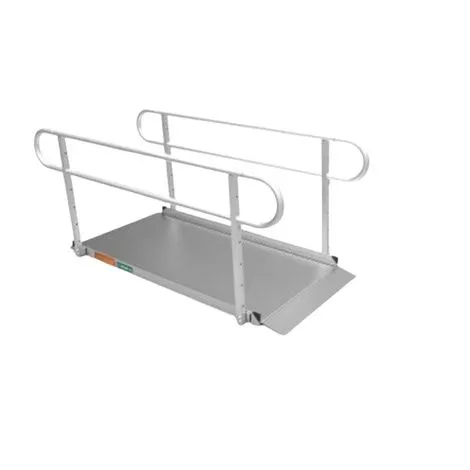
EZ-ACCESS GATEWAY 3G Solid Surface Portable Ramp Features
- A safe ramp solution designed to provide home access
- Available with or without handrails
- Can be used for semi-permanent applications and can easily be moved or relocated as needs change
- With lengths up to 10ft, the GATEWAY 3G can accommodate a series of entryway steps
- Features a formed top transition for secure placement, and an adjustable bottom transition that allows smooth ramp-to-ground conversion
- Designed for the rigors of repeated, everyday use in all outdoor weather conditions but can also be used indoors
- Durable construction for years of maintenance-free use
- Will, not rust, rot or deteriorate
- The solid, seam-free surface features permanent (extruded) tread for slip resistance and superb traction
- Raised side rails, also known as curbs, help to prevent mobility devices from driving off the edge of the ramp
- Made of lightweight, heavy-duty aluminum and features a 1,000 lb. weight capacity
- Available in 3, 4, 5, 6, 7, 8, 9, & 10-foot lengths with a standard width of 36 inches
User Manuals
- GATEWAY 3G Solid Surface Portable Ramp Technical Specifications
- GATEWAY 3G Ramp Instructions
- GATEWAY 3G Portable Ramp Warranty
- GATEWAY 3G Brochure
How To Determine The Proper Ramp Length?
- Determine the incline that your chair is designed to climb.
- Measure the rise (distance from the top step, porch, van, etc. to the ground).
- Refer to Incline Chart to find the proper ramp length.
- At any incline, use the ramp only with a qualified helper
Note: Refer to your mobility equipment manufacturer for the proper degree of incline/decline and chair direction before attempting ramp use. Never exceed your mobility equipment manufacturer recommendations.
Which type of GATEWAY 3G Solid Surface Ramps to select?
- Ramp Only
– A great option for users who don’t require handrail assistance when making their way up or down the ramp
– The 1-piece design means no assembly or movable parts; just secure the ramp in the desired position, and it is ready to be used - Ramp with Two-line Handrails and Loops
– Two-line handrails with loops offer increased safety and user stability
– Features smooth, continuous top rails – which are welded for extra strength and durability – and a lower second rail offers an additional gripping surface
– Assembly is quick and easy, requiring only minimal tools to attach the handrail posts and loops - Ramp with Vertical Pickets and Loops
– Smooth, continuous top rails with vertical pickets and loops offer an added level of safety, especially for children and pets. Pickets meet the 4-inch sphere rule for spacing
– Picketed insert sections are pre-assembled for quick and secure installation
– Assembly is quick and easy, requiring only minimal tools to attach the handrail posts and loops
More On EZ-ACCESS GATEWAY 3G Solid Surface Ramps
Fastening Ramp To Landing (All Ramps)
- Place the ramp top lip transition plate (identifiable by the two pre-drilled holes) so it extends onto the landing as far as possible. The ramp top lip transition plate must be fully supported by the landing
- If Resting on a wood landing
– Fasten the top lip transition plate by installing one 1/4″ x 1″ long self-drilling, stainless steel wood screw (not supplied) through each hole. - If Resting on a concrete landing
– Use the two pre-drilled holes in the top lip transition plate as a template to mark the positions on the concrete to drill
– Using a 1/4″ masonry bit, drill two holes at the previously marked locations. Drill to a depth specified by the pin drive anchor manufacturer’s instructions
– Align the top lip transition plate over the drilled holes
– Install 1/4″ x 1-1/2″ pin drive concrete anchors (not supplied) into the holes of the upper transition per the pin drive concrete anchor manufacturers instructions - Temporary installation
– Use the two pre-drilled holes in the top lip transition plate as a template to mark the positions and drill two 1/4″ holes at least 1-1/2″ deep.
– After drilling, make sure that the holes are free of any residue and/or debris
– Align drilled holes with holes in the ramp top lip transition plate, and then insert supplied clevis pins through each hole
Installing (Optional) Handrails
- Both handrail styles, two-line, and handrails with vertical pickets come pre-assembled. Regardless of the style, the process of attaching handrails to the ramp is the same
- Turn the ramp section upside down on a flat surface (do this