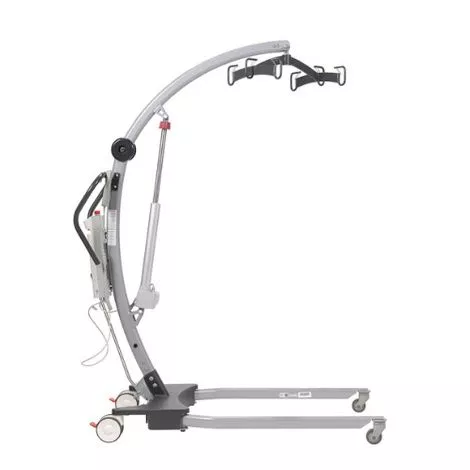
Features of Drive Battery Powered Lift
- Elegant, contemporary design with soft lines but still heavy duty
- Easily lifts resident from floor
- Smart & Safety Technology – LCD
- Redundant controls allow for use even if hand control is inoperable
- Lift safety stop if resident or caregiver accidentally gets in the way of the boom arm
- Maintenance monitoring: by months or lift cycles
- Base option: Manual
- Oversized sealed rear casters roll easily and lock securely
- Visual battery fuel indicator on Hand Pendant and Lift Control Module
- The NEW Six-point cradle with spring clips offers a more secure and wider footprint, reducing sling squeeze. Shallow height offers a greater height range
- Can be charged on or off the lift
Drive Medical Power Lift User Guides
- Drive Levantar Power Lift Parts
- Drive Medical Power Lift User Manual
What to buy with Power Patient Lifts
- Posey Vest Restraint
- Sammons Preston Magnetic Chair Alarm
- Drive Medical Stand-Up Sling
How to assemble Drive Levantar Floor Lift?
- Remove all the parts from the carton and place them on the floor, taking care to protect the finish from damage. Place the base in a clear space and apply the rear brakes. If you are assembling a unit with a power base, connect the two power base connectors before sliding mast into base. Be careful not damaging the wire connectors.
- Fit the mast and boom assembly into the base socket
- Secure the mast and boom assembly to the base with the four attachment bolts
- Connect the manual leg adjustment handle to the base if you are assembling the manual base.
- Warning: Avoid trapping fingers. Keep fingers away from the end of the mast when inserting it into the base socket. The label indicates full engagement of the mast on the side of the mast. The electric leg operation will not function unless the mast is fully engaged.
- Line the handle assembly up to the rear of the mast and attach using the two screws provided. The screws needed to attach the handle are kept in the user instruction wallet for safekeeping.
- Fit the power pack to the lift and ensure the latch holding the pack in place is fully engaged.
- Plug the handset and actuator cables into the bottom of the controller.