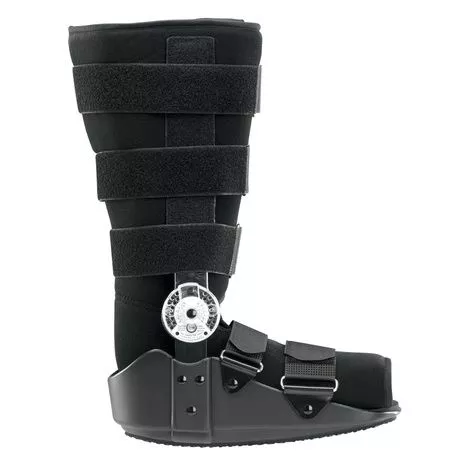
Features
- Breg Pin Cam Walker Boot examples of common use:
- – Acute trauma or post-operative use
– Post ORIF and surgical stabilization after tendon/ligament repairs (i.e. Achilles tendon)
– Moderate to severe ankle sprains
– Stable foot and/or ankle fractures
Breg Pin Cam Walker Boot Instruction Manual
More On Breg Pin Cam Walker Boot
- Application:
– Place foot and leg inside soft liner with heel firmly back; wearing a sock is recommended
– Pads may be inserted to accommodate extra space at either side of ankle or at the heel
– The larger tongue pad should be positioned over the top of the foot before securing the liner
– Close the liner snugly securing the Velcro closures
– Position the heel of the foot against the back of the rocker boot
– Brace uprights should be positioned midline over the ankle
– Press the uprights securely against the liner , if there is a slight overlap, position the upright under the overlap (This will allow later removal of the brace without changing the position of the upright)
– Position the tibial straps in alternating fashion and secure all straps
– Determine the required angle of dorsiflexion and/or plantar flexion and adjust according to the instructions below - Note: Adjustments should be managed by the clinician directly involved with the patient
– Uprights may be contoured to the individual patient if required
– The edge of a table or chair may be used to aid in contouring - Fixed Ankle:
– Fixed position other than neutral is desired
– Remove the lower cap screw and rotate the cover 180°, exposing the upper cap screw
– Loosen but do not remove the upper cap screw
– Rotate the cover to allow removal of the two pin stops
– The pins may be easily pushed out from behind
– Note the angular markings of the disc part of the ankle joint and replace the pins in the appropriate holes, e.g. 15-15 for 15° plantar flexion
– Retighten the upper cap screw
– Rotate the plastic cover until the opening faces down
– Replace the lower cap screw - Free or Limited Motion:
– Remove the upper hex-socket screw to rotate the hinge cover
– Rotate the cover to allow removal of the two pin stops
– The pins may be easily pushed out from behind
– Select the appropriate holes for limited motion stops and replace the pins for free motion, the pins are not replaced
– Do not retighten the upper cap screw for either free or limited motion setting
– Rotate the plastic cover until the opening faces up
– Replace the hex socket screw - Also Buy {Separately}
– Ottobock Malleo Immobilizer Night Splint